Posts

Showing posts from October, 2021

Christmas cards

Image
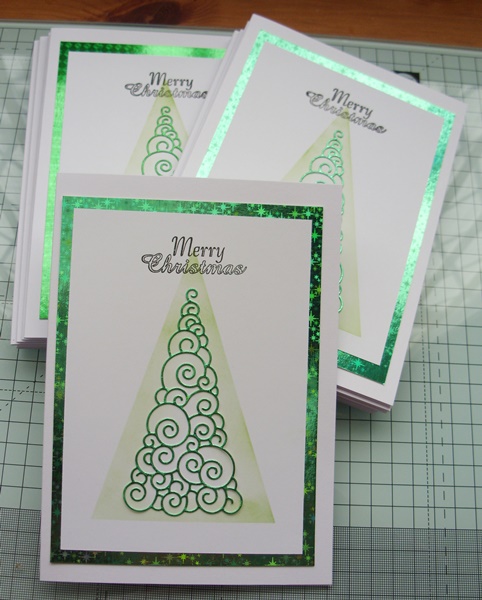
 Hello! Every year, for some time now, I have made a batch of Christmas cards for my husband to give out. When he was working they were for his work colleagues - now he is retired they are for those he still keeps in touch with, & others that he sends to. I say a batch of cards, because I make them all the same & he prefers the clean & simple style, so this is the easiest way to achieve this. Here is this years "batch"; There are 15 cards in this years batch & I created each part of the card step-by-step. I started by sorting all the base cards, then cut 15 green layers & 15 white layers.  This left me with 15 trees to die-cut.  The only problem was, I obviously wanted to do green trees & therefore the layers had to be green too - but I discovered I didn't have enough green miri card for it all. Fortunately the old brain kicked in & I reverted to the old technique of "gutting" - & so I took the green layers & die-cut a tree fr

A birthday card

Image
 Hello everyone I hope you are having a good weekend. Today I have another recently made birthday card to show you.  This one was for a dear friend who like myself celebrates being 80 this year. The embossed panel is one from "John Next Door" as, in fact, are the blossoms & foliage. I used "Craft Too" - "Mica Magic" to colour the blossoms & the daises on the panel & applied the colour with a cotton bud for a light touch. I slipped the 80 into the centre of the wreath of blossoms, so it was a little more subtle. In my stash I found a rather delicate piece of background paper that went well with the colour I had chosen for the blossoms.  Very pleased with this one.

A birthday card

Image
 Hello again, how are you all? I have another recently made birthday card to show you today.  This one was made for one of our daughters-in-law who had a birthday in the last few days. It's a bow front card, & when it is standing up the right hand edge of the front is tucked under the topper on the inside right. Makes a lovely mantlepiece centre piece. I embossed some card with a very fine foliage design then cut it into 3 panels.  Then coloured the panels with Distress inks applied with a sponge applicator. lightly touching the embossed pattern. The topper for the inside I stamped in Adirondack ink in a caramel colour & then light went over it with a water brush to get a soft finish. The various layers were adhered to black card before gluing to the base card.  The card lays flat for posting. Thank you for stopping by I hope you will call again.

An Anniversary card

Image
Here I am again with another recent card I have made.  This one was for our youngest son & his wife on the occasion of their wedding anniversary this week. I used a 15cm square card with a scalloped edge & some beautiful papers that I have had for about a year.  Some of them have the same design in two opposite corners such as this one.  This enables me to create a little 3-d by cutting around the flowers from one of the corners.  The remaining portion then was used for the background & layer. The papers are so delicate & pretty. I bought them for use in photo albums, but haven't made an album for a few months now, as I cannot sit at my desk for long sessions. I will be back again in a few days with 2 more recent cards I have made.  In the meantime I slowly get Christmas cards put together. My husband & I had our booster jabs last Friday, so we are well vaccinated, as we have also had our flu jab.  I hope you are all well & keeping safe & healthy.

A birthday card

Image
Good afternoon everyone I hope you are all well. Today, I have another recently made birthday card to show you. This time it is one for our youngest son.  I searched the internet for royalty free designs for the background & also found a suitable digital stamp for the sentiment.  Good old Internet to the rescue again. The music is, the actual music for   .... "Happy Birthday", & I recoloured it to sepia tones. On the inside, rather than just a flat insert, I printed another of the digital sentiments & put it in as a popup.  The method where you cut a tab on the centre fold. It was easy to add a few more musical notes to take away all the whiteness. The next couple of months will be quite busy with birthdays & an Anniversary so I should be kept occupied. Then of course there is also Christmas cards.  I have made a good start on Chrismas,      but as I have quite a lot to do I am trying out some quick & easy ideas this year. At the moment I cannot sit at my