Posts

Showing posts from 2021

Wishing you all a very Merry Christmas

Image
 Well, its nearly here the big day! I have a couple more of the Christmas cards I made this year - but they are the ones for family so I cannot show them on here until after Christmas In the meantime I will wish you all a Very Merry Christmas - I hope you all have a lovely time.

Christmas cards

Image
Good evening all. Here I am again with a couple more of the Christmas cards I have made. On these 2 cards I used a Woodware stamp that had got lost at the back of my drawer with Christmas stamps. I decided to use up some DSP for the front of the card, & then a die ink pad & watercolour the image. Oops - I didn't realise that this photo was so blurry. Again, as frequently happens, I must have had a shaky moment when I took the photo. This one I changed the layout but used the same design idea. Thank you for stopping by, please call again.  Take care & keep safe.

Christmas cards

Image
 Hi every one!  How is your weekend going? I have been very busy with writing my Christmas cards over the last week, which in actual fact is early for me to be sending out. So I am pleased with myself.  There are still a few to go out & just close family ones to be sorted. These do not have to be posted so gives me a little more time. I try to remember to photograph all my cards as they are finished, but sometimes, like at Christmas I forget as I am concerned about getting them ready to post. So, I will have made some that I have not shown you. Here are 2 that I made recently which I remembered to photograph. I love this stamp its from Honey-Doo . Have a great weekend! 'Bye for now.

A birthday card

Image
 Good evening everyone. This evening I have a clean & simple birthday card to show you - its for my elderly cousin (95!) The photo is a little blurry I must have been  shaky when taking it & only just noticed it. I have been watching a young lady on YouTube called Natasha & the idea of the freehand lines around the image is hers.  Lots of her followers have loved it & there have been lots of photos of cards using this.  So I thought this would be the perfect card for me to try it out. Loved doing it & I think I may make some of my CAS Christmas cards in the same style. I hope you are all well & keeping warm in this cold weather.

Christmas cards

Image
 Good afternoon everyone.  I don't want to speak too soon but here in my part of North Wales we seem to have missed the early snow, so far. Not sure that will last though. Today, I have some more of my Christmas cards I have been making, to show you. Festive papers & die-cuts for these three. Looking at them in the photo I may add a couple of peel-off holly / snowflake corners.   I think they need a little something just to finish them off. Going to take a rest now for lunch then back into the craft room to create some more cards whilst the creative juices seem to be flowing. Stay warm & safe & thank you for popping in to see what I have been up to.  Happy crafting!

More Christmas cards

Image
 Good evening everyone. This evening I have some more Christmas cards I made recently.  I need a lot of cards so as I have a few hand problems, this  year the cards will be clean & simple designs. I have made 2 different batches of 8 cards each.  This is the first batch. The cards are 4"x4" & the stamped image has been embossed with silver embossing powder,  then layered onto silver paper before placed on the card front.   There is a stamped verse inside which has also been embossed with silver embossing powder. This is the second batch, made them in exactly the same style as the others. Now for the next design which perhaps will be a little more elaborate, but not too much so. Also i need to give my attention to a Wedding Anniversary card that has to be sent to the USA as soon as I can. Make sure you stay safe & warm now that we have this cold spell upon us. Thank you for dropping by please call again.

Another challenge card

Image
Good afternoon everyone, I am here with another challenge card set by a colleague in my club group. She kindly gave us written instructions with photos & then we just got on with making the card.  Here is my attempt; The card is made from a base 6" x 6" square card, along with a single 6" x 6" spare piece of card. The focal image is stamped to the right hand side of the spare piece, then the outside of the focal image is trimmed away including about 2" of the unstamped card above & below the image. A contrast coloured strip is place behind the image giving a narrow border (the gold strip on my card).  Then on the front of the base card a strip of about 2" to the right hand side is inked & decorated to suit.  The cut sheet is placed onto the base card, with the image over the inked strip of the base card, on foam sticky tape to raise it.   It is a lot easier than it sounds in that description, I will definitely be making more like this.

Challenge card

Image
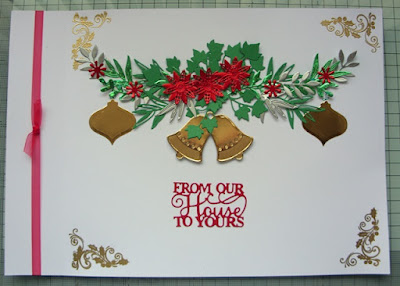
 Good afternoon everyone. How is your weekend going? Are you busy with Christmas shopping & preparations. It won't be long now will it? The card I have to show you today was set as a challenge by a group I am part of, & the challenge was to make a card with a Christmas garland. It is created with lots of die-cuts. Some foliage, baubles, greeting & a double bell. The corners are a stamped & embossed ivy corner. I made the card by using 2 pieces of card the same size, then scoring at the left-hand side at about 1.5" on one of them.  The two pieces then glued together & some ribbon to decorate it. I did lay down some green ink in the shape of the garland before adding the foliage in order to give it some depth.  Quite fiddly & time consuming so I will not be making lots of these. Enjoy the rest of your weekend.  Have fun & keep warm there is some cold weather forecast here.

More Christmas cards

Image
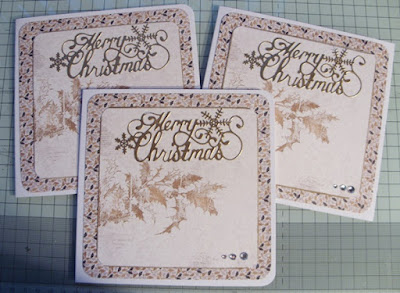
Hello everyone. Some more Christmas cards made still using up papers etc from my stash.  This time I made 3 of the same design as that was how far the papers went that I had pulled out of the box. I found these rather pleasing antique finished papers which went so well together. The bottom layer is covered in little holly sprays in dark brown, light brown & gold. The one I chose for the focal point had these vintage large holly sprays on them.  After cutting them down to size I was left with a strip from each one, with another small spray on it which will also be useful. The "Merry Christmas" die-cut I had left over from last year (I had cut too many). They had been die-cut from white card & I heat embossed them with gold embossing powder.   Three little gems at the bottom to add a little bling completes the cards Time to look out some more papers & work out a design for another batch of cards. Still a long way to go before I have made enough. Despite getting very

Christmas cards

Image
 Hello everyone.  I hope you have something nice planned for the weekend - perhaps lots of crafting? Today I have a couple of photos of some more of the Christmas cards I have been making.  Like many of us crafters I have loads & loads of papers that need using up.  Whilst I am mainly a stamper I do need to use up these Christmas papers I have & will try to incorporate some stamping if only a small greeting. This first set, of 8 cards, are 5"x5" square. I used some gold paper for a layer, then two different Christmas background papers as the main feature. One set has angels the other has Father Christmas on them. There is a small "Merry Christmas" stamped in black ink on each one. This is a set of 2 cards that are 5" x 7" landscape orientated. A more Christmassy background in green with lots of holly on, then the same Christmas angel background paper, as before, for the main feature. The greeting this time is "Christmas Greetings" in gold

Sympathy card

Image
 Hi everyone. This last week I have had to make one of those we all hope not to have to make, but needs must from time to time. A very dear friend of ours lost his son last week & this was the card I created; I find that commercial sympathy cards can be a little over the top, so I try for simplicity. A delicate "With Deepest Sympathy" die set in a frame, cut out of white & layered on a pale blue. The wording inside - simple & from our own thoughts.

Armistice Day

Image
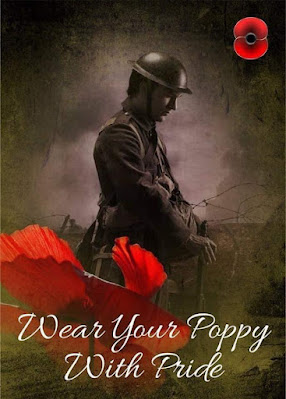
WE WILL REMEMBER THEM  WE WILL NOT FORGET WHAT THEY DID FOR US

Club challenge

Image
 Good afternoon everyone. The card I have to show you today is from a recent club challenge - where the subject was "Autumn". After some thought on this I decided to go with the "Joseph's Coat" technique, & used a Woodware stamp of a large daisy type flower. I randomly coloured the card with autumnal colours of ink, then stamped the flower in Versmark. I did remember to make sure that the inked background was completely dry before continuing with that stage. Next I heat embossed the image with clear embossing powder.  The final stage was to colour the whole of the design with black pigment ink then polish the design which removed the ink from the embossing. I remember the first time I was shown how to do this technique I was horrified when the tutor said to cover it thoroughly with black ink. What a lovely surprise when she told us the next stage - to polish the design & out popped our stamping. Here is the challenge card; The label just has the word &qu

Another birthday card

Image
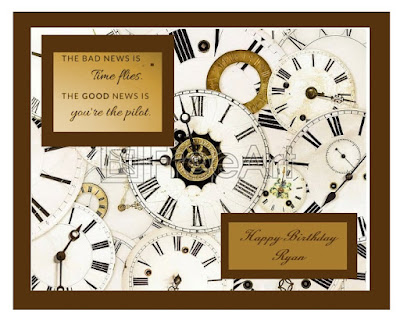
 Hello again.  Today I have another recently made birthday card to show you. This one was for our son-in-law who also  had a birthday this week. He & our daughter live in Kansas City, so it is always difficult to judge timing for posting, to make sure it arrives on time.  Evidently this one arrived bang on the day. Hooray! I always find it more difficult making cards for men & designing one for our son-in-law sets other difficulties.  Because we do not see them very often it is difficult knowing about interests. But I found this on an old papercraft CD I have & thought I would be able to work with it & I am rather pleased with the outcome. Thank you for stopping by, please say hello in the comments section, so that I know someone has been here.

Birthday Card

Image
 Hello everyone - happy Sunday! Today I am showing you my most recently made card.  A birthday card for one of my daughters-in-law who had a birthday this week. I can't remember what the name of this front fold is, but it is a great way of using double-sided papers that are building up in your stash. I used a pretty shade of lilac for this card & some white paper flowers which I brushed a lilac ink onto to lightly colour the petals.  Some little clear sparkly stars dotted around to add just a little bling. I have some more cards recent cards to show you over the next couple of days. Thank you for visiting my little space on the internet, please call again.

Club challenge

Image
 Good morning all. Now the weather is turning colder I hope you are all keeping warm, & also not affected by all these floods.  Take care where ever you are. The card I have to show you today is one for a challenge set by one of my clubs - any form of transport. I printed off a piece of a road map for Wales & aged it with Distress Ink - I think I used the walnut shade. Then I decided to have torn edges for an aged effect, which I also did around the sentiment. I chose the VW Beetle from my set of car stamps because I use to have one - it was a deep orange colour, this one is red. I loved my Beetle to bits, they are such great character cars. On one of the 2 sets of transport related stamps I have one of them had this tyre mark type image - so I used that in the background. Quite enjoyed making this one. Need to save it now for when a man amongst family & friends has a birthday. Thank you for visiting, please call again. 

Christmas cards

Image
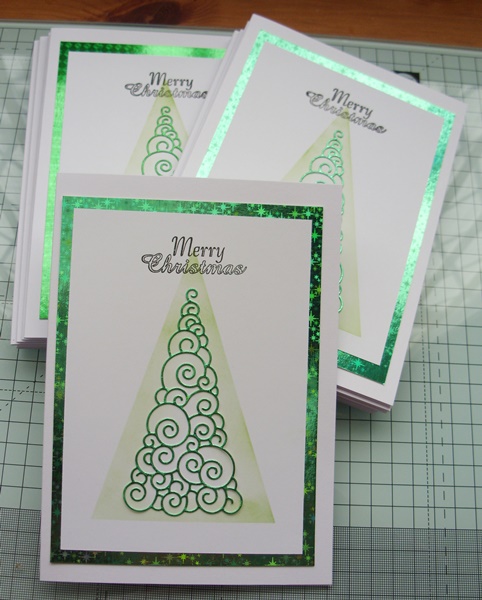
 Hello! Every year, for some time now, I have made a batch of Christmas cards for my husband to give out. When he was working they were for his work colleagues - now he is retired they are for those he still keeps in touch with, & others that he sends to. I say a batch of cards, because I make them all the same & he prefers the clean & simple style, so this is the easiest way to achieve this. Here is this years "batch"; There are 15 cards in this years batch & I created each part of the card step-by-step. I started by sorting all the base cards, then cut 15 green layers & 15 white layers.  This left me with 15 trees to die-cut.  The only problem was, I obviously wanted to do green trees & therefore the layers had to be green too - but I discovered I didn't have enough green miri card for it all. Fortunately the old brain kicked in & I reverted to the old technique of "gutting" - & so I took the green layers & die-cut a tree fr

A birthday card

Image
 Hello everyone I hope you are having a good weekend. Today I have another recently made birthday card to show you.  This one was for a dear friend who like myself celebrates being 80 this year. The embossed panel is one from "John Next Door" as, in fact, are the blossoms & foliage. I used "Craft Too" - "Mica Magic" to colour the blossoms & the daises on the panel & applied the colour with a cotton bud for a light touch. I slipped the 80 into the centre of the wreath of blossoms, so it was a little more subtle. In my stash I found a rather delicate piece of background paper that went well with the colour I had chosen for the blossoms.  Very pleased with this one.

A birthday card

Image
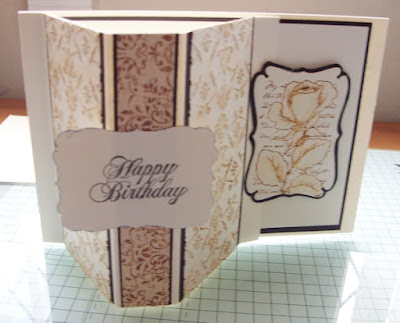
 Hello again, how are you all? I have another recently made birthday card to show you today.  This one was made for one of our daughters-in-law who had a birthday in the last few days. It's a bow front card, & when it is standing up the right hand edge of the front is tucked under the topper on the inside right. Makes a lovely mantlepiece centre piece. I embossed some card with a very fine foliage design then cut it into 3 panels.  Then coloured the panels with Distress inks applied with a sponge applicator. lightly touching the embossed pattern. The topper for the inside I stamped in Adirondack ink in a caramel colour & then light went over it with a water brush to get a soft finish. The various layers were adhered to black card before gluing to the base card.  The card lays flat for posting. Thank you for stopping by I hope you will call again.

An Anniversary card

Image
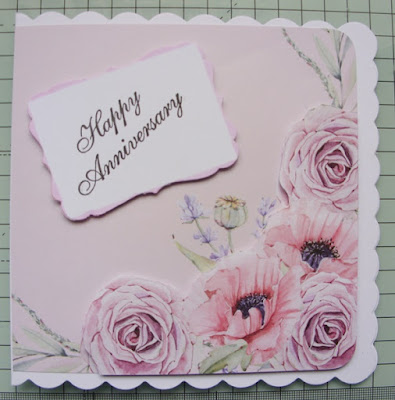
Here I am again with another recent card I have made.  This one was for our youngest son & his wife on the occasion of their wedding anniversary this week. I used a 15cm square card with a scalloped edge & some beautiful papers that I have had for about a year.  Some of them have the same design in two opposite corners such as this one.  This enables me to create a little 3-d by cutting around the flowers from one of the corners.  The remaining portion then was used for the background & layer. The papers are so delicate & pretty. I bought them for use in photo albums, but haven't made an album for a few months now, as I cannot sit at my desk for long sessions. I will be back again in a few days with 2 more recent cards I have made.  In the meantime I slowly get Christmas cards put together. My husband & I had our booster jabs last Friday, so we are well vaccinated, as we have also had our flu jab.  I hope you are all well & keeping safe & healthy.

A birthday card

Image
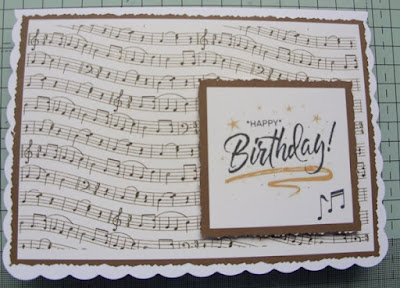
Good afternoon everyone I hope you are all well. Today, I have another recently made birthday card to show you. This time it is one for our youngest son.  I searched the internet for royalty free designs for the background & also found a suitable digital stamp for the sentiment.  Good old Internet to the rescue again. The music is, the actual music for   .... "Happy Birthday", & I recoloured it to sepia tones. On the inside, rather than just a flat insert, I printed another of the digital sentiments & put it in as a popup.  The method where you cut a tab on the centre fold. It was easy to add a few more musical notes to take away all the whiteness. The next couple of months will be quite busy with birthdays & an Anniversary so I should be kept occupied. Then of course there is also Christmas cards.  I have made a good start on Chrismas,      but as I have quite a lot to do I am trying out some quick & easy ideas this year. At the moment I cannot sit at my

Looking back at "living circles"

Image
 Hello! In my last post a couple of days ago I showed a card for my brother that included a decorative panel using "living circles". I mentioned that I had learnt about this through an online session with stamping friends.  The panel on his card was a lot plainer than how I usually decorate with them.  So I thought I would look out a photo of one I made before & show it to you. I took this photo before adding any wording, which I left until I knew who it would go to. Take care & happy crafting.

A birthday card

Image
 Hello again. Today, I have the second of my recent makes to show you. This time the card was for my brothers birthday. Even after all these years of making my own cards I still find it difficult to make cards for men. Usually a card can be made around the interests of the person the card is for.  My brother is one of those people who has interests - for example he loves his motorbike - but he is awkward & doesn't particularly like them on cards when he actually has one to ride. So, I had a long session on Google searching for quick & easy cards for men.  Pinterest had lots too. Anyway, here is what I finally made. not sure I was inspired with all the searching I had done, everything was just in my craft room --     The "Happy Birthday" embossing folder is very useful & can be used in many different ways. The thing is that now I have to remember who I  have used it for so that I don't repeat myself. 😀 Last year, in an online session with some stamping col

A birthday card

Image
 Hello again everyone. After another long gap between sessions of creativity, due to my health,  I have some cards to show you. The first one is a card I made for a stamping colleagues birthday; I made the background by spritzing a couple of Brusho pigment colours. In hindsight I should have made the front on a separate layer, as the Brushos bled through to the inside which meant I had to make a complete covering inside layer. Not a problem, - it would just have been neater. The stamp is one of All&Creates designs - I just have a couple.  I wasn't completely happy with the front until I had the idea of a "scribbly" border. I hope she liked it. Another to show you over next couple of days. Please leave a comment - or just say "hello".  It's so that I can see if anyone is actually visiting me, although the statistics seem to say I have one or two people popping in. Take care & happy crafting!

A Christmas Card

Image
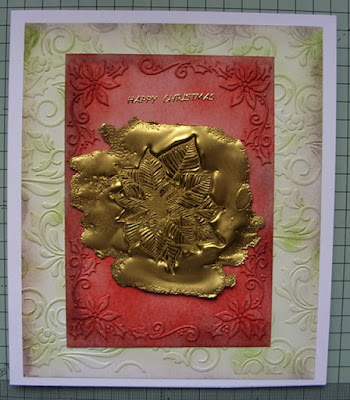
The card I have to show you today, which is 3 days later than I said I would (it appears tomorrow possibly does never come 😊), was a challenge from one of my Rubber Stamping Clubs I used to take care of. The challenge was - Embossing.  Simply that. But it does open the door to quite a few techniques if you sit & think about it first. Here is my card; The base card is a folded white card approximately 7" x 9". I ran a piece of white card through a large embossing folder that has holly sprays on it, & inked it with green Distress Ink.  Next I embossed another piece of card with a poinsettia frame in it & inked that with red Distress Ink.  Finally, the topper embellishment. I firstly inked the Poinsettia stamp with Versamark Ink leaving the stamp on the ink pad to keep it moist. Next, I heated a pile of gold Embossing Powder on a heat proof mat & when it was melted placed the stamp into it.  I gave it just a little pressure to ensure all the stamp was impressed

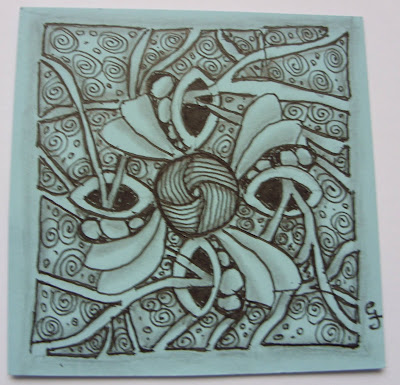
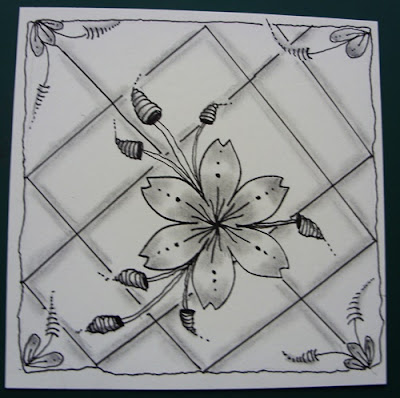
Another tangle

Image
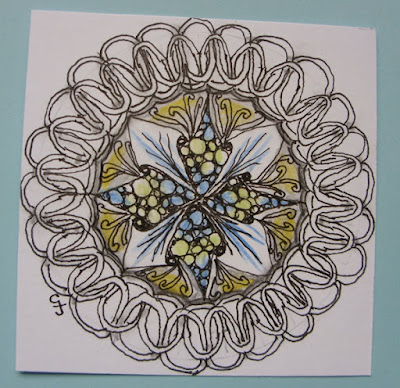
Good heavens! I can't believe it has been 2 weeks since I last wrote a post.  Will have to make up for that over next few days. Today I sat & worked on another tangle tile from Sanntangle designs. This needs a steady had which, unfortunately, I didn't have today. But I persevered & the result is not too horrendous.  The centre square is divided into 4 squares, but I didn't get them even, although I don't think it notices too much, thankfully. I am going to try it again when, hopefully, my hand is steadier & I might even add some colour. I also made a Christmas card a couple of days ago that used various embossing  techniques.  Will blog about that tomorrow.

Recent cards

Image
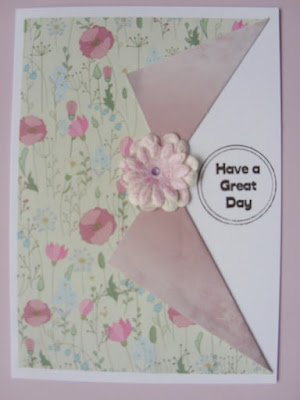
Well! I have had quite a creative few days.  I have 2 cards to show you which were shown to me by a crafting friend - they are called Peek-a-Boo or Collar Cards. I rather enjoyed making this card - it was easy to do once decisions had been made on shape & size of card & then which papers.  Choice of papers slightly easier if you use double-sided papers, or paper pads with toning sheets in.  Takes a bit longer if you have to hunt through loads of paper. These were made from paper pads with toning papers.  So I had to make my own double-sided papers. I think I will now look out some Christmas papers & make a batch towards my Christmas stock which will be very useful. After all there is only 129 days to go - which is 18.5 weeks.  I don't know which sounds the closest.

A tangled birthday card

Image
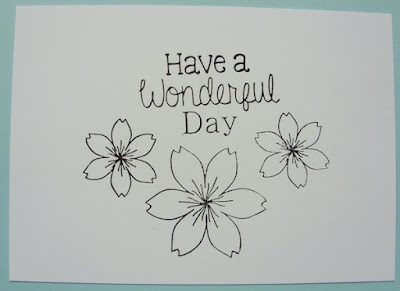
 Hello everyone!  Where has summer gone?  It's all grey, damp & miserable today. Today I have a little birthday card to show you that includes some tangle design. It started with some stamped flower heads from Dreamees . This is the basic card stamped with the flower heads & sentiment. This is with some simple tangling worked around it & light colouring, then mounted on a similar colour paper before being mounted on the base card. It wasn't until I photographed the card that I noticed the sentiment is slightly on the wonk. Ah well! I am really enjoying the tangling I do & glad that now I have found a way to use alongside my stamping for making cards.

Another tangle tile

Image
Hello everyone.  Working on my last Sanntangle tile a couple of days ago relaxed me quite a bit & I felt ready to try another one. Here is the one I did yesterday.  This is tile number 99 in Sandra Rushtons tile series.  Fortunately it isn't compulsory to try them in order or I would never get to some of these later designs.  I choose carefully to ensure it isn't a design outside my capabilities, but still enough to tax me a little. The tile looks a grey/blue here but is in fact white, but not bright white. I had great difficulty in keeping the chains a rounder shape but was pleased that I was able to follow the method for drawing them. It looks difficult to start with but when it is broken into stages & by trying to keep a logical & methodical mind it wasn't so bad to do.  I will probably draw this one again at some time. At least I seem to have got my mojo back to a certain degree & hope to door some more crafting including stamping.  After all we are into

A tangle tile

Image
Hi, I don't know how my mojo got stolen but it is back today - thank you for returning it. I just hope it hasn't got the travel bug & disappears again.  😄  I decided this afternoon to draw another tangle tile - one of Sandra Rushton's (Sanntangle) tiles.  This design is Tile #093 I decided to draw this design on a pale blue tile.  It took me 2 attempts as the earlier stages were very shaky.  I stopped for a while to try & steady my hand & managed a little better. I am hoping if I try another tile tomorrow things might be a little less shaky as my hand will get "Tuned in" so to speak. This was probably the most complicated one I have tried so far, so I am really quite pleased with it. With this stupid shaky hand I even have trouble stamping - but thankfully most of the time I use a stamp platform, so hopefully that won't get spoilt. Feeling much brighter now I have managed that today.  Now! what shall I do tomorrow.

A strange week ....

Image
 .... which has in fact, been a little longer than a week. I can't explain. I just cannot get inspired to do things. I know what I want to do but don't get around to doing it.  Very lethargic (I think).  I seem to be just happy watching others crafting (lots of you tube). It has got to stop. I need to give myself a good talking to. I was asked a little while ago by one of my clubs I used to run to set a challenge for them.  So I dug deep went way back in time & suggested card embellishments made from paper casting. Paper casting? For this exercise, a posh name for playing with toilet tissue, water, stamps & embossing folders. Even though I now had something to think about I almost left it to the last moment to make something myself.  Wood mounted rubber stamps make the best impression for this little technique & I don't own many these days,  Anyway I found some stamps & an embossing folder & had a play. Here are the three items that survived this exercis

Another tangle

Image
 Hello everyone! How are you all during this very variable weather we are having. I hope you are all well. Today I have a photo of another of the tangle designs I have been working on.  This one is of my own designs which I suspect is inspired by the many designs & patterns that I have looked at on the Internet. My hand is rather shaky which shows on some lines, but I seem to be smoother when working on my own ideas rather than when copying others. I suppose I am a little more relaxed then. Thank you for visiting me - do come again & I am always pleased to receive comments or its nice if you just say "Hi".

A recent card

Image
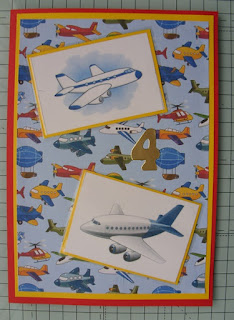
Good afternoon on a very hot day where it is difficult to know what to do with yourself.  I hope everyone is fine is this weather. Recently I spoke of the challenge of a birthday card for our grandsons fourth birthday. Well, his birthday was yesterday & I did manage to come up with a colourful idea built around an interest he has at the moment.  Aeroplanes & helicopters.  He is so fascinated by them that his parents took him to a nearby airport yesterday for him to watch the landing & leaving as part of his birthday treat. Here is my card; This is the front inside left inside right I Googled for royalty free papers & images.  Having selected the images I wanted I put them into a photo management software & resized them, then printed them & cut into small photos.  I took one of the helicopters & through the same software managed to insert our grandsons face as if he was riding in it. All the images were then laminated. I was pleased with the outcome, I hope h

Celebrating....

Image
...... that one of my challenge cards was chosen in top 3.  The challenge blog was Addicted to Clean & Simple  & the challenge was for a Christmas Card  This was the card I submitted. I haven't been myself for a couple of days, a combination of state of health & this hot weather - but this has cheered  me up no end, & hopefully kick start my mojo.

Another tangle

Image
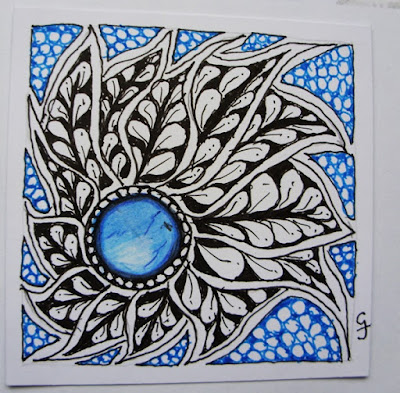
 Good afternoon on a beautifully sunny warm day. As I am not allowed to sit out in the sun due to adverse reaction of sun with my medication I have been in my craft room this afternoon having a little tangle fun. This design I have seen somewhere in my travels around Google & You Tube looking at Zentangling ideas. So I have produced it pretty much from memory. My hand was very shaky this afternoon so some of the smaller shapes I found a bit tricky to do & I can see through the photo that the colouring in, particularly in black, there are some white patches.  It is the first time I have attempted to make a gem on a piece, & I am actually quite happy with that. Like everything new it is practice & more practice that helps improve work. So must set aside time for more practice. I hope you are having a good weekend, enjoy the sunshine & thank you for stopping by.

Another challenge - Addicted to Clean & Simple

Image
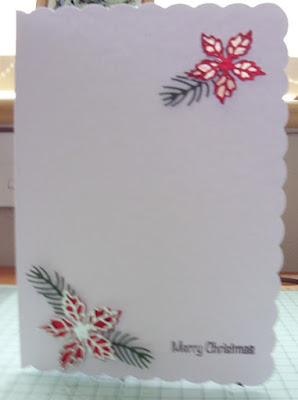
Good afternoon everyone.  I have another Challenge blog card for you today & once again the theme is Christmas. The blog this time is Addicted To Clean and Simple , & here is my card; Oops! it looks like I had a slight tremble when I took the photo. Apologies for the blur. Last Christmas I made a Christmas Wreath to hang in the lounge window & had quite a few poinsettias left over along with some foliage.  So I thought this would be a good way to use some of them up.  They are from John Next Door dies & the Merry Christmas stamp has been around for ages. Why not pop over to the blog, you can do so by clicking on the name above, & have a look at other entries.  In fact - why not have a go yourself. Thank you for stopping by, see you again.

Another Challenge - Christmas in July.

Image
 Over on the Simply Less is More  blog the challenge this time is for "Christmas in July". Here is my offering for this challenge; The stamp & the Christmas greetings are little stamps I have had around for some time & cannot remember where they came from.  I stamped in archive black ink & coloured with felt & gel pens. Do you agree that sometimes a more simple design is harder to create than a full on image? Why not pop across to the blog, by clicking on the link above,  & take a look at all the lovely cards that will be entered in the challenge. Perhaps you will be inspired to make a card yourself & join in the challenge. Thank you for stopping by, please call again.

Another tangle

Image
 Well. It's been a little quiet on the crafting scene the last couple of days.  I haven't actually made anything, but have prepared some bits & pieces for a birthday card for our grandson who has a birthday later in the month. I spent quite a bit of time in Pinterest trying to discover inspiration for his card. Whether from that searching or not I have now made a decision on what to do & as I said earlier have started to gather items together to make the card. Now to decide exactly what the card will look like.  It is, & always has been harder to make cards for males. Our grandson will be 4, & it is still hard without doing anything too babyish. I thought I would give you something to look at so I am posting a photo of one of my earlier tangle cards; Its a very simple design as it is one the early one of my own designs. Thank you for stopping by, do call again when you have time.

Card Challenge - Tuesday Morning Sketches.

Image
I almost missed the closing date for this challenge.  Time doesn't have much meaning currently where days run into more days & the time whizzes by.  So the challenge this time is over at Tuesday Morning Sketches , & as the name implies we work from sketches. Here is the sketch and here is my entry for the challenge I cut the squares from white card & coloured them with Distress Ink. The sketch shows a black border & rather than layer them onto black card I drew a border with a black Promarker pen.  The largest of the squares I raised on double-sided sticky pads.  The stamps I used are from AALL&Create "Botanicals modified" set. As I hadn't coloured the background or used DSP I drew a black line border just to relieve the white space. Thank you for stopping by I do hope you enjoyed your visit & will call again.