Posts

Showing posts from November, 2021

More Christmas cards

Image
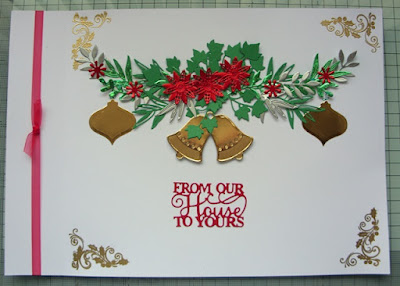
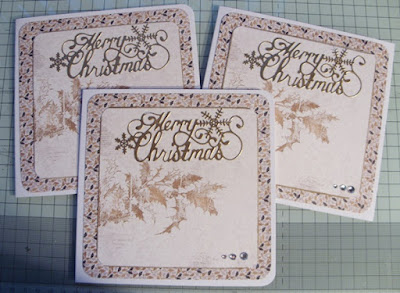
 Good evening everyone. This evening I have some more Christmas cards I made recently.  I need a lot of cards so as I have a few hand problems, this  year the cards will be clean & simple designs. I have made 2 different batches of 8 cards each.  This is the first batch. The cards are 4"x4" & the stamped image has been embossed with silver embossing powder,  then layered onto silver paper before placed on the card front.   There is a stamped verse inside which has also been embossed with silver embossing powder. This is the second batch, made them in exactly the same style as the others. Now for the next design which perhaps will be a little more elaborate, but not too much so. Also i need to give my attention to a Wedding Anniversary card that has to be sent to the USA as soon as I can. Make sure you stay safe & warm now that we have this cold spell upon us. Thank you for dropping by please call again.

Another challenge card

Image
Good afternoon everyone, I am here with another challenge card set by a colleague in my club group. She kindly gave us written instructions with photos & then we just got on with making the card.  Here is my attempt; The card is made from a base 6" x 6" square card, along with a single 6" x 6" spare piece of card. The focal image is stamped to the right hand side of the spare piece, then the outside of the focal image is trimmed away including about 2" of the unstamped card above & below the image. A contrast coloured strip is place behind the image giving a narrow border (the gold strip on my card).  Then on the front of the base card a strip of about 2" to the right hand side is inked & decorated to suit.  The cut sheet is placed onto the base card, with the image over the inked strip of the base card, on foam sticky tape to raise it.   It is a lot easier than it sounds in that description, I will definitely be making more like this.

Challenge card

Image
 Good afternoon everyone. How is your weekend going? Are you busy with Christmas shopping & preparations. It won't be long now will it? The card I have to show you today was set as a challenge by a group I am part of, & the challenge was to make a card with a Christmas garland. It is created with lots of die-cuts. Some foliage, baubles, greeting & a double bell. The corners are a stamped & embossed ivy corner. I made the card by using 2 pieces of card the same size, then scoring at the left-hand side at about 1.5" on one of them.  The two pieces then glued together & some ribbon to decorate it. I did lay down some green ink in the shape of the garland before adding the foliage in order to give it some depth.  Quite fiddly & time consuming so I will not be making lots of these. Enjoy the rest of your weekend.  Have fun & keep warm there is some cold weather forecast here.

More Christmas cards

Image
Hello everyone. Some more Christmas cards made still using up papers etc from my stash.  This time I made 3 of the same design as that was how far the papers went that I had pulled out of the box. I found these rather pleasing antique finished papers which went so well together. The bottom layer is covered in little holly sprays in dark brown, light brown & gold. The one I chose for the focal point had these vintage large holly sprays on them.  After cutting them down to size I was left with a strip from each one, with another small spray on it which will also be useful. The "Merry Christmas" die-cut I had left over from last year (I had cut too many). They had been die-cut from white card & I heat embossed them with gold embossing powder.   Three little gems at the bottom to add a little bling completes the cards Time to look out some more papers & work out a design for another batch of cards. Still a long way to go before I have made enough. Despite getting very

Christmas cards

Image
 Hello everyone.  I hope you have something nice planned for the weekend - perhaps lots of crafting? Today I have a couple of photos of some more of the Christmas cards I have been making.  Like many of us crafters I have loads & loads of papers that need using up.  Whilst I am mainly a stamper I do need to use up these Christmas papers I have & will try to incorporate some stamping if only a small greeting. This first set, of 8 cards, are 5"x5" square. I used some gold paper for a layer, then two different Christmas background papers as the main feature. One set has angels the other has Father Christmas on them. There is a small "Merry Christmas" stamped in black ink on each one. This is a set of 2 cards that are 5" x 7" landscape orientated. A more Christmassy background in green with lots of holly on, then the same Christmas angel background paper, as before, for the main feature. The greeting this time is "Christmas Greetings" in gold

Sympathy card

Image
 Hi everyone. This last week I have had to make one of those we all hope not to have to make, but needs must from time to time. A very dear friend of ours lost his son last week & this was the card I created; I find that commercial sympathy cards can be a little over the top, so I try for simplicity. A delicate "With Deepest Sympathy" die set in a frame, cut out of white & layered on a pale blue. The wording inside - simple & from our own thoughts.

Armistice Day

Image
WE WILL REMEMBER THEM  WE WILL NOT FORGET WHAT THEY DID FOR US

Club challenge

Image
 Good afternoon everyone. The card I have to show you today is from a recent club challenge - where the subject was "Autumn". After some thought on this I decided to go with the "Joseph's Coat" technique, & used a Woodware stamp of a large daisy type flower. I randomly coloured the card with autumnal colours of ink, then stamped the flower in Versmark. I did remember to make sure that the inked background was completely dry before continuing with that stage. Next I heat embossed the image with clear embossing powder.  The final stage was to colour the whole of the design with black pigment ink then polish the design which removed the ink from the embossing. I remember the first time I was shown how to do this technique I was horrified when the tutor said to cover it thoroughly with black ink. What a lovely surprise when she told us the next stage - to polish the design & out popped our stamping. Here is the challenge card; The label just has the word &qu

Another birthday card

Image
 Hello again.  Today I have another recently made birthday card to show you. This one was for our son-in-law who also  had a birthday this week. He & our daughter live in Kansas City, so it is always difficult to judge timing for posting, to make sure it arrives on time.  Evidently this one arrived bang on the day. Hooray! I always find it more difficult making cards for men & designing one for our son-in-law sets other difficulties.  Because we do not see them very often it is difficult knowing about interests. But I found this on an old papercraft CD I have & thought I would be able to work with it & I am rather pleased with the outcome. Thank you for stopping by, please say hello in the comments section, so that I know someone has been here.

Birthday Card

Image
 Hello everyone - happy Sunday! Today I am showing you my most recently made card.  A birthday card for one of my daughters-in-law who had a birthday this week. I can't remember what the name of this front fold is, but it is a great way of using double-sided papers that are building up in your stash. I used a pretty shade of lilac for this card & some white paper flowers which I brushed a lilac ink onto to lightly colour the petals.  Some little clear sparkly stars dotted around to add just a little bling. I have some more cards recent cards to show you over the next couple of days. Thank you for visiting my little space on the internet, please call again.

Club challenge

Image
 Good morning all. Now the weather is turning colder I hope you are all keeping warm, & also not affected by all these floods.  Take care where ever you are. The card I have to show you today is one for a challenge set by one of my clubs - any form of transport. I printed off a piece of a road map for Wales & aged it with Distress Ink - I think I used the walnut shade. Then I decided to have torn edges for an aged effect, which I also did around the sentiment. I chose the VW Beetle from my set of car stamps because I use to have one - it was a deep orange colour, this one is red. I loved my Beetle to bits, they are such great character cars. On one of the 2 sets of transport related stamps I have one of them had this tyre mark type image - so I used that in the background. Quite enjoyed making this one. Need to save it now for when a man amongst family & friends has a birthday. Thank you for visiting, please call again.