Posts

Showing posts from April, 2022

A club project

Image
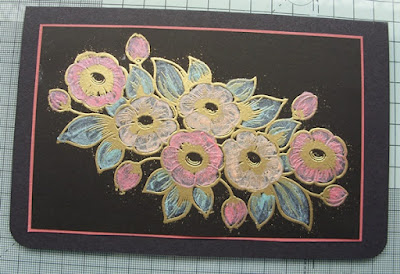
Good afternoon everyone. Another weekend is upon us plus it is another bank holiday! Just recently a colleague in one of my clubs gave us a project for a different card. It had a flap front. Here is the card I made; The centre panel is actually a slim tent fold card which is glued to a square piece  of cardstock, after adding DSP layer. The banner across the centre is also a flap. The stamped images are from new stamps, to me, from Julie Hickey. A week later I decided to make another one. I didn't choose the papers they chose me. As they were laying on my desk close together & I thought it would be a good idea to use them. As the design was fairly dark I added strip gold peel-offs to lift the look. Surprisingly the "Happy Birthday" looks silver but was in fact gold. Have a good Bank Holiday weekend, lets up the weather will be good to us. Thank you for visiting my little crafty space & please call again.

Using scraps

Image
Good evening everyone. A few more cards to show you that I have made recently using papers & toppers in my scraps & bits box. The resulting cards will be added to a collection I am building for a friend who raises funds for his scouts group. There are two photos of DL cards using left over designer paper, & plus some of those lovely toppers from the pads by Crafty Individuals I have quite a lot of those Crafty Individual toppers, as I used to buy quite a lot of their paper pads including in particular the ones full of toppers. I have so much paper & embellishments that I need to use so helping my friend with his fund raising is one way of putting them to good use. Thank you for visiting my little blog I hope you found it interesting.

A challenge

Image
This was a challenge set by a colleague in one of my stamping groups I belong to.   "To use up our scraps." Good afternoon, by the way, I hope everyone is well. I have been trying to use my scraps for a little while now but put my mind to doing some different styles for this challenge.                     I actually meant to have the second one of this first style with the squares at the top.                                       As they are complete cards I cannot just turn it up the other way.                                  Most of these cards do not have any sentiment on as I prefer to do that                                                         when I know  who it is going to. These next three cards were made from scraps left over from a photo album I have just made, Really pleased with how these turned out, especially the square quilt design. I had wanted to try one of those for some time. I thought I would add some Christmas cards to my stash. The baubles were just

Stepper Cards with a twist

Image
Good afternoon everyone I hope you are all enjoying a very pleasant bank holiday weekend. A couple of months ago I watched a video by Paul Ford, who is a great album maker, but also introduces new cards. The card this time was a Stepper Card & the twist, if you could call it that, was that it is a faux stepper card. I know several people who have problems when making the traditional stepper card. Getting the folds & then the cuts in just the right places & not being satisfied with the finish. I was also one of those people. Well this video was perfect in curing that problem.  I now can produce really nicely & neatly finished stepper cards. Here are the ones that I have made.  The first photo was the first one I tried & it was for a challenge I entered depicting a different era.  The others I made to see how well it worked for the other styles. So this card below was made direct from the instructions. Then these next 3 were made with the different layouts, including

Unfinished projects

Image
Good afternoon everyone. It's a lovely sunny day here today - but the wind is quite fierce & it feels really really cold. Unfinished projects? They are those partially started cards, backgrounds that have not been put to use.  So! I decided I must work my way through any of those I have.  Here are the first four; The two cards above were from a video by Natasha Foote (check out her YouTube channel). I regularly watch her ideas. This one was using metallic inks/paints on black card. I didn't have metallic ink, but did I have some pearlised paints which also give a good effect. This little card was made from the remains of an A4 cardstock I had decorated with inks & stamps. It had been laying in my Unfinished Projects box for a while so I made the card base, which I dry embossed, then folded as a Z-fold card. Next I cut the background into 2 pieces added them to the card, along with 2 little flowers. This one is a card shape I found on Pinterest. The centre is die-cut, th

A special project

Image
Hello everyone. I have been rather busy with just one project  during this week.  I didn't work on it every day, as I get a little tired if I sit & craft for too long. So best to do it in smaller sessions. Last year I made a photo album for my brother that held photos of our parents on their holidays, after they had retired. When I made it I printed off 2 of each photo with the intention to make an album for myself. So, this is what I have finally been busy making this week. Their travels took them to Italy, Switzerland, Austria, Poland & Morocco, as well as others. Sadly our parents are no longer with us, but in going through some of their belongings we found a box full of slides they had taken of the places they had visited. My husband was able to put them through some adapter & produce actual photos - so this is what I used. Here are just a couple of photos of the album, to give you an idea of what I have made; The sleeve the album sits inside The front of the album